Betaflight Setup
This guide describes the steps we took to configure our drone using Betaflight.
Step 1: Connect to Betaflight Configurator
Connect your drone’s flight controller to your PC using a USB cable. Then open the Betaflight Configurator and click Connect.
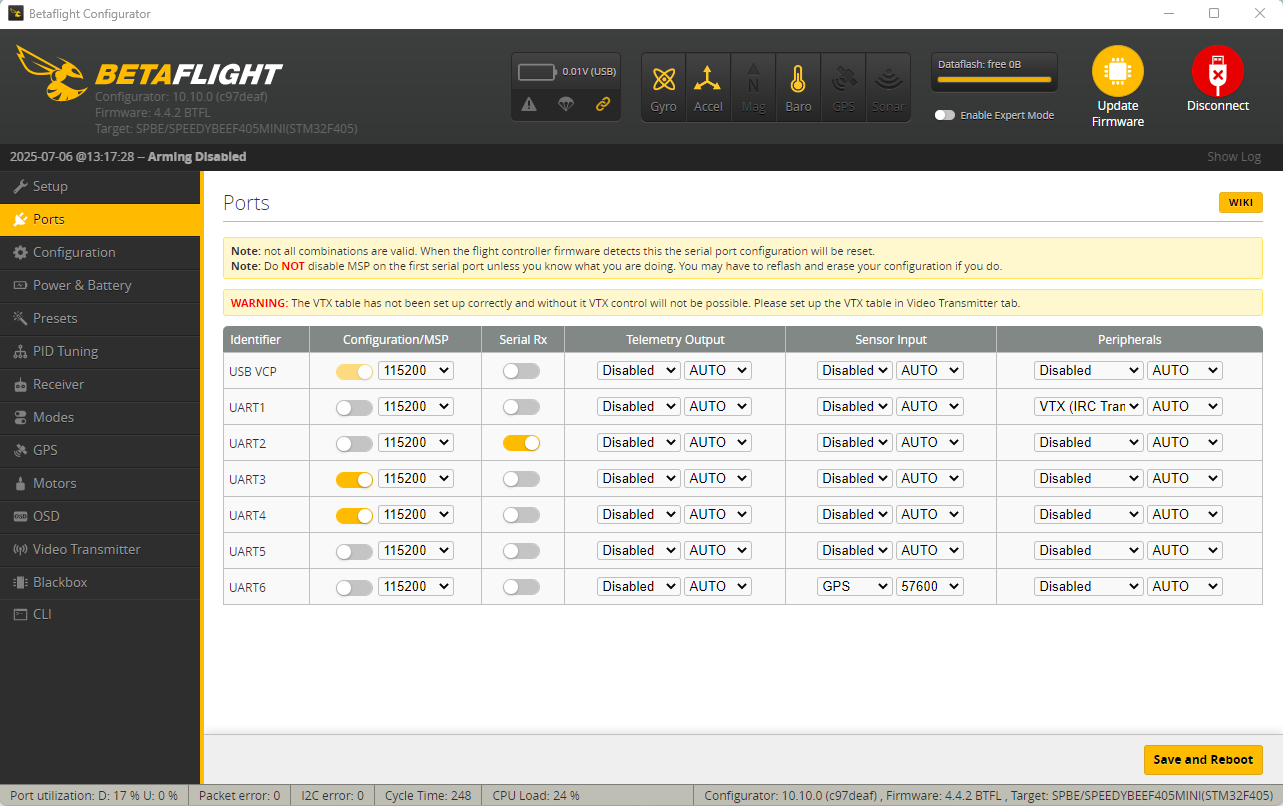
Step 2: Configure Ports
Go to the Ports tab and configure the ports as follows:
USB VCP: Configuration/MSP — enabled
This is usually automatically enabled. It is necessary for the FC to communicate via the USB-C port
UART1: Peripherals — VTX (IRC Tramp)
VTX needs to be enabled for the video transmission, the correct protocol version is important
UART2: Serial RX — enabled
The ELRS receiver is connected to UART2
UART3 & UART4: Configuration/MSP — enabled
UART3 needs to be enabled for the MSP communication with the Raspberry Pi
UART6: Sensor Input — GPS (baud rate: 576000)
Only necessary if a GPS modul is connected
Step 3: Set CLI MSP Override to 15
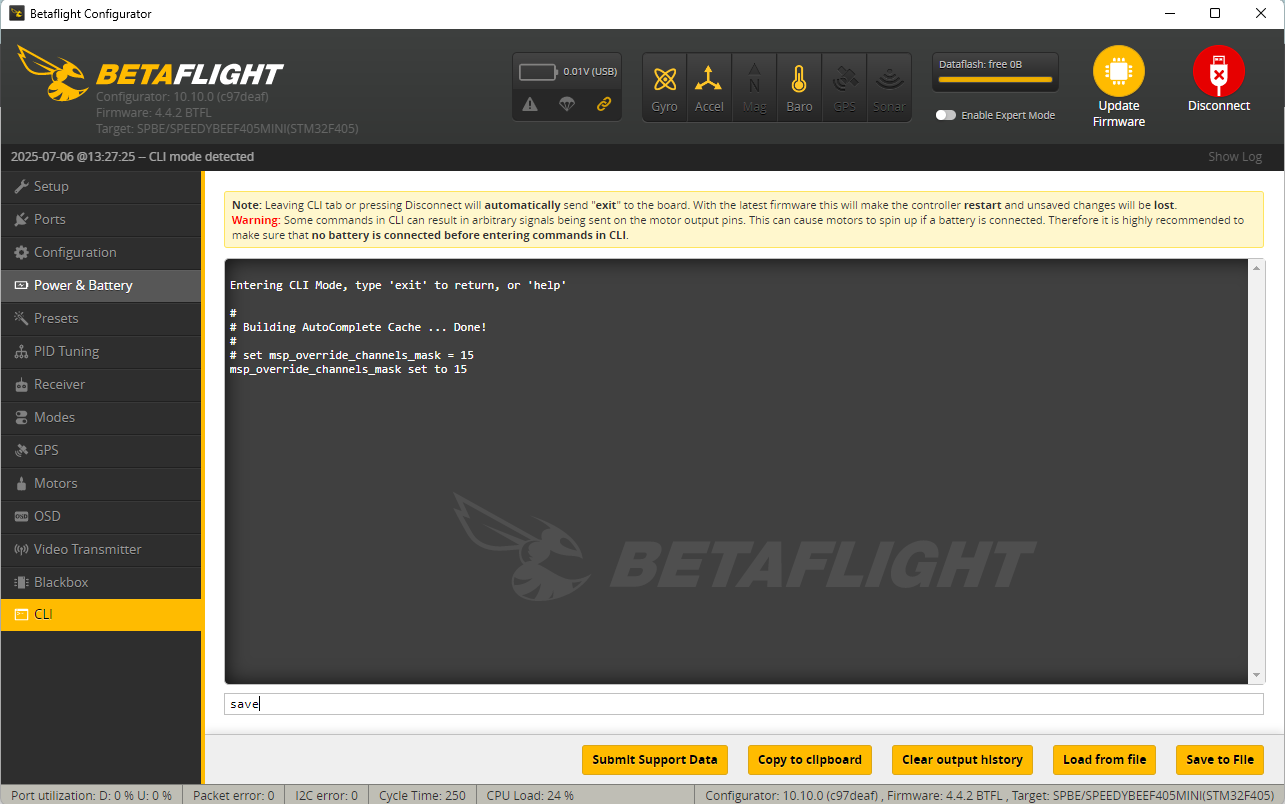
Open the CLI tab.
Enter the following commands:
set msp_override_channels_mask = 15 save
Step 4: Configure Modes
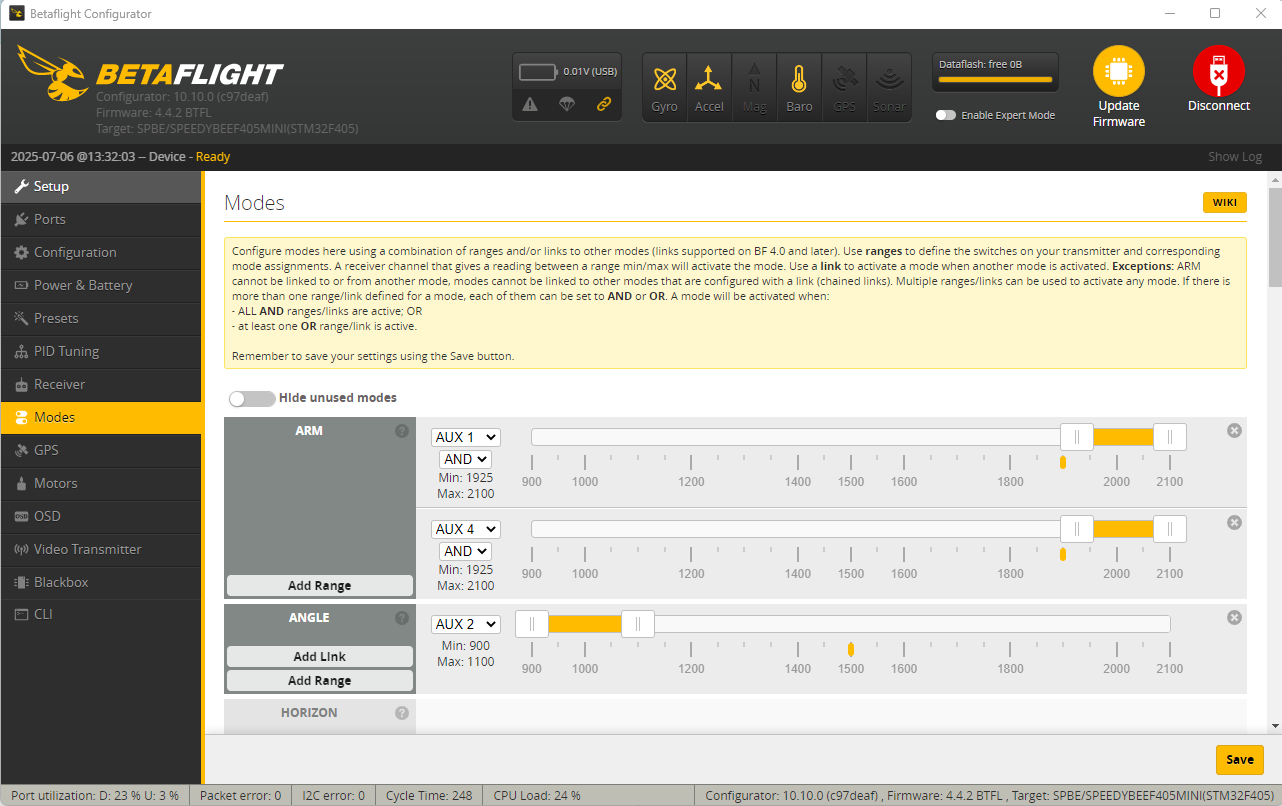
Navigate to the Modes tab and assign switches on your transmitter as follows:
Basic Flight Modes
ARM: AUX1 and AUX4 — range: 1925–2100
ANGLE: AUX2 — range: 900–1100
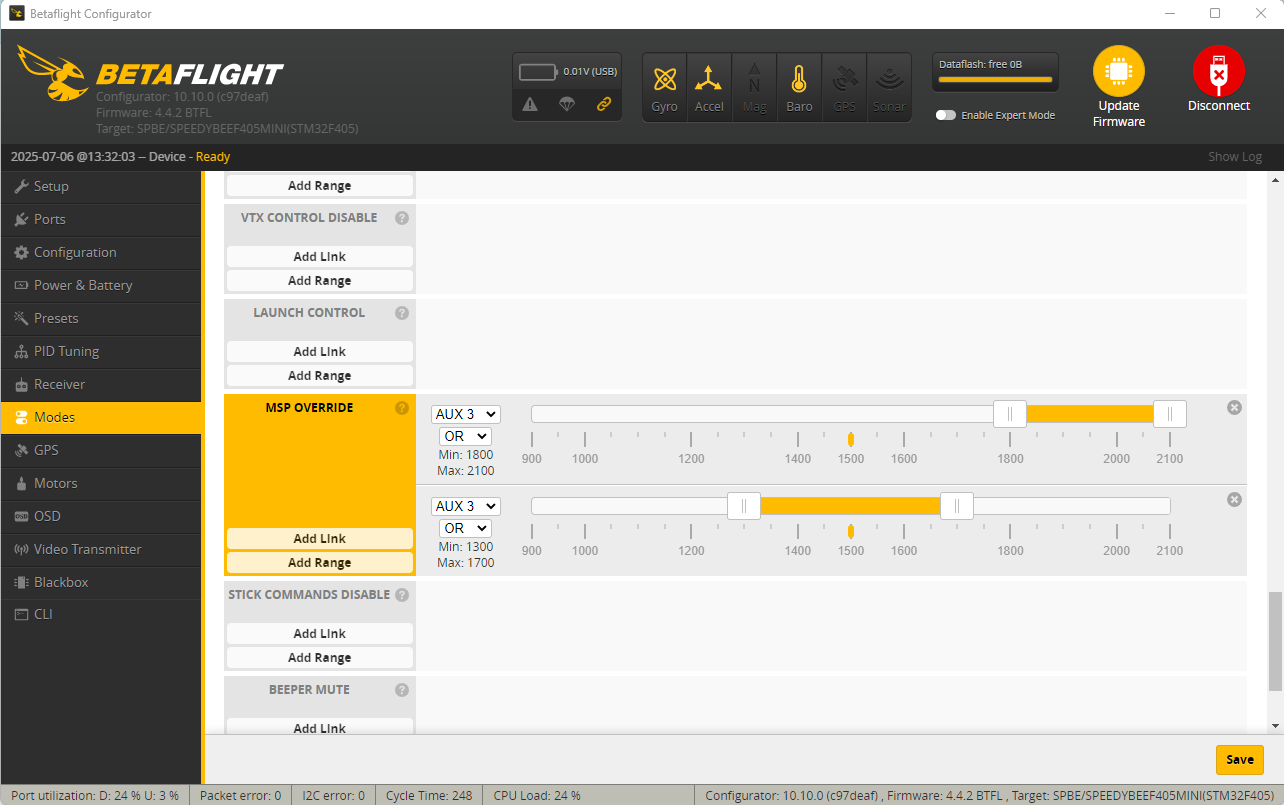
Custom MSP Override Mode
MSP OVERRIDE: AUX3 — range:
1300–1700 → Mode A
1800–2100 → Mode B
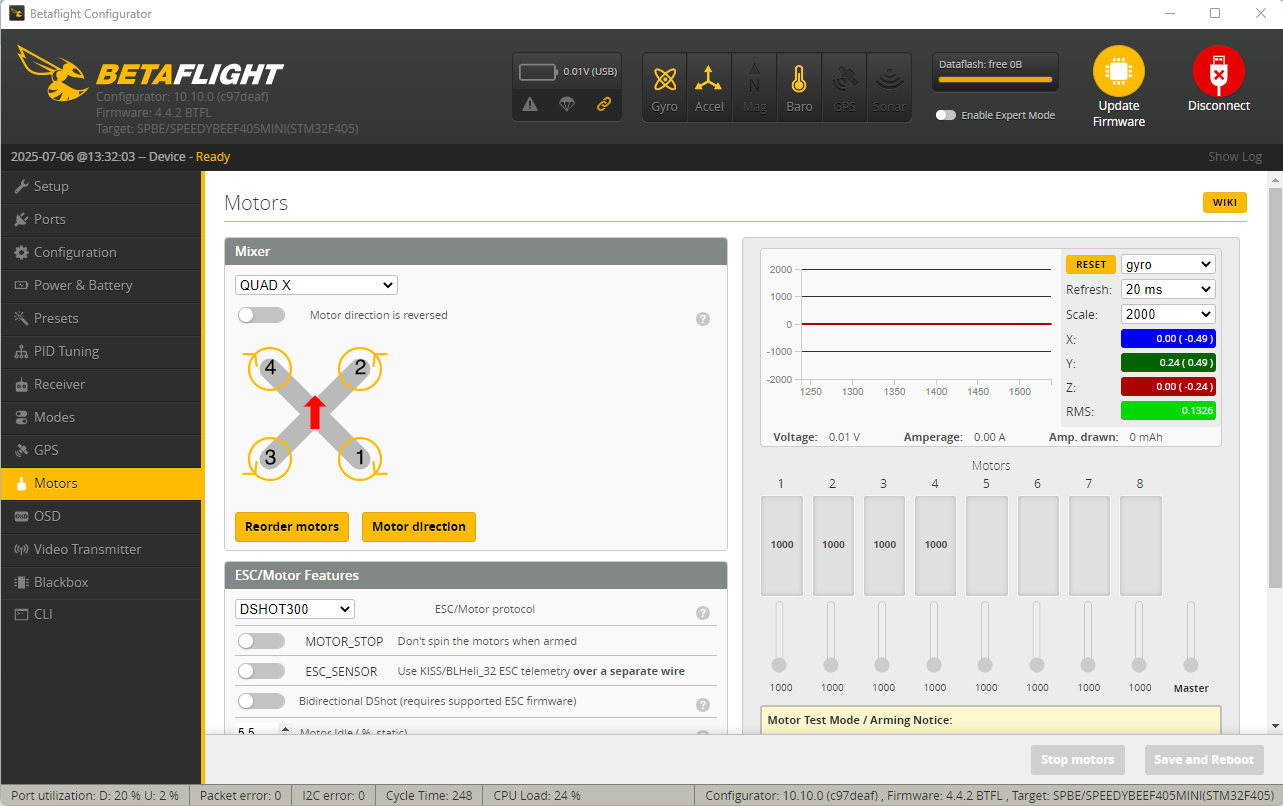
Step 5: Verify and Set Motor Direction
Go to the Motors tab.
Remove all propellers!
Enable motor testing.
Test each motor individually and verify the direction matches the Motor Diagram displayed in Betaflight.
